MEMBERS ONLY: To gain full access to the Half Yard Club projects please login or sign up
Tablet and Notebook Case + Four Bonus Embroidery Templates
Easy |

Quick Links: What you'll need Project steps
This folder will hold a tablet up to 8 x 10½in (20.5 x 26.5cm) plus an A5 notebook, and the secure zipped pocket on the back is perfect for pens.
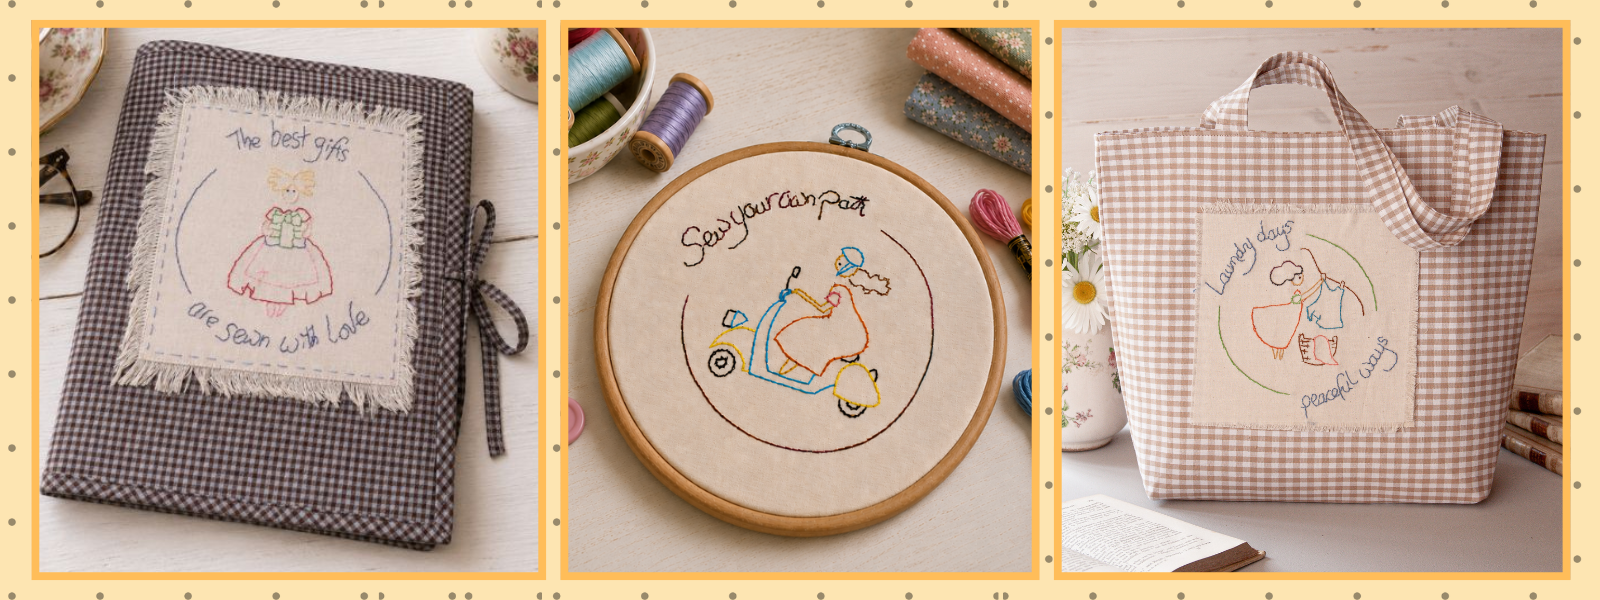
This useful folder is designed to hold your tablet, an A5-sized notebook and pens, pencils, erasers and other stationery. The Ada and Pearl images can be embroidered on the front of the folder, or on the back or even the inside. I’ve given it a vintage look by embroidering onto a calico patch and fraying the edges.
The embroideries
I created four embroidery designs to choose from, including one that I thought would work well on a laundry or peg bag. Feel free to work all four of them to make a coordinated set! You also have the alphabet in upper- and lower-case letters that can be traced and either added to your project so you can add your own wording or used on their own.- Trace the images onto your fabric with an erasable marker pen (I prefer heat-erasable) and sew over the lines. I used one strand of embroidery thread and backstitch to create a fine line; two strands would make the lines a bit thicker, or one strand and stem stitch would work well too. Feel free to add other stitches, such as cross stitches and lazy daisies dotted around the image.
- It’s fun to use lots of coloured threads. Variegated thread works well, but one thread colour such as red or black would look good too!
- The dots and eyes are created with small French knots.
Make it your own!
- Leave off the text and just stitch the image.
- Add your own wording. I have included an alphabet for you to trace if you’d like to do this.
- Use raw-edge appliqué with free-motion sewing to add colour and texture to your embroidery design, or just free-motion stitch the whole thing with no appliqué and no other embroidery!
By the end of this project, you’ll have:
- Created a personalised tablet case or stationery folder.
- Worked some simple embroidery.
- Made a simple zipped pocket.
You may also like:
- Drawstring Cube
- Pro Storage Container with Dividers
- Tote Bag Sewing Pattern
- Simple Storage Bag
- Sewing machine with a standard foot
- Erasable marker pen (I use heat-erasable)
- Embroidery needle
- Scissors or snips to cut your thread ends
- Pins and/or fabric clips
- Basting spray if not using fusible wadding/fleece
- Optional: glue stick to help with inserting the zip
- Optional: zip foot for inserting the zip (or do as I like to do and use your standard foot, moving the needle over to one side)
- Optional: spray starch, such as Best Press
- 12in (30.5cm) square of background fabric for the embroidery: I’ve used a lightweight calico but any light- to mediumweight plain fabric will work
- 44 x 19½in (112 x 49.5cm) of outer fabric
- 44 x 19½in (112 x 49.5cm) of inner fabric
- 17 x 11½in (43 x 29cm) piece of wadding/fleece (I used high-loft poly wadding)
- 13in (33cm) zip (or longer and cut to size)
- 82in (208cm) of 1in (2.5cm) binding: this can be shop-bought or made from your outer and/or lining fabric and it doesn’t need to be cut on the bias (I chose to cut all my remaining outer fabric into strips to make bias binding so that my check fabric was on point)
- Embroidery threads in the colour(s) of your choice
- 17 x 11½in (43 x 29cm) of outer fabric for the cover
- 17 x 11½in (43 x 29cm) of inner fabric for the lining
- 11½ x 2½in (29 x 6.5cm) of outer fabric for the zipped pocket
- 11½ x 9in (29 x 23cm) of outer fabric for the zipped pocket
- Two 11½ x 13in (29 x 33cm) rectangles of inner fabric for the inside pockets (as I used a striped fabric, I turned it so that the stripes were in the opposite direction to the inner)
- Two 10 x 1in (25.5 x 2.5cm) strips of outer fabric for the ties (you could use ribbon if you prefer)
MEMBERS ONLY: To gain full access to the Half Yard Club projects please login or sign up
You will need:
Equipment
Materials
To cut:
MEMBERS ONLY: To gain full access to the Half Yard Club projects please login or sign up
Project steps:
Step 1
This is content that only logged members can see! Please create an account or login to be able to view project steps, otherwise you'll be limited to non-member content.
This is content that only logged members can see! Please create an account or login to be able to view project steps, otherwise you'll be limited to non-member content.
Step 2
This is content that only logged members can see! Please create an account or login to be able to view project steps, otherwise you'll be limited to non-member content.
This is content that only logged members can see! Please create an account or login to be able to view project steps, otherwise you'll be limited to non-member content.