MEMBERS ONLY: To gain full access to the Half Yard Club projects please login or sign up
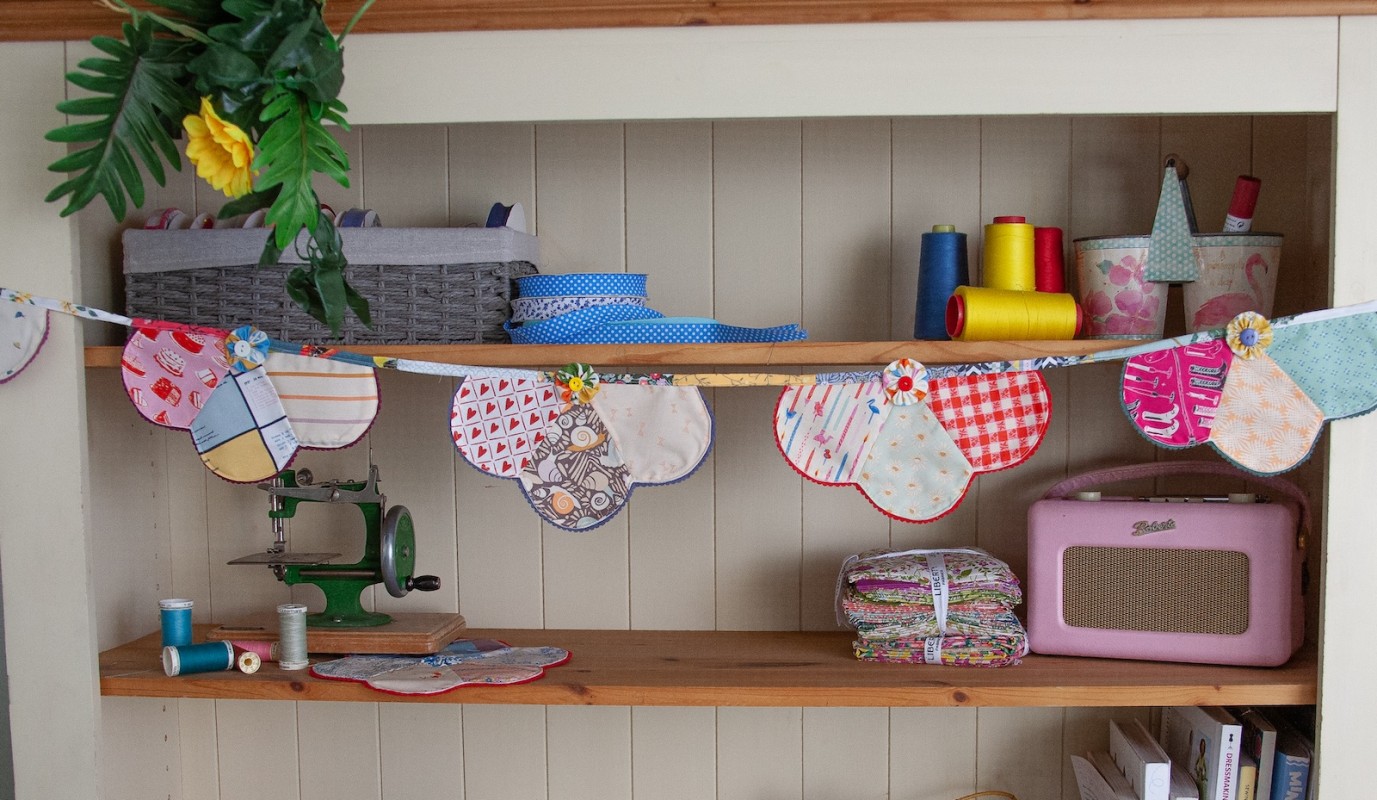
Stash Busting Bunting | Easy to Sew Dresden Decoration
Easy |

Quick Links: What you'll need Project steps
This is a quick, fun and easy project that can be made from leftover fabric or a charm pack you couldn’t decide what to do with.
Here’s a great way to use up your scraps! This colourful bunting combines a traditional patchwork shape with Suffolk puffs to create bunting with a retro feel.
Finished size of each pennant: 10 x 5in (25.5 x 12.75cm). Note: use a ¼in (5mm) seam allowance.
Fabric focus
Charm packs: the Dresden shapes in this bunting fit perfectly into the 5in (12.75cm) squares of charm packs, so if you have any squares leftover from other projects or a charm pack you haven’t used yet, then now’s the opportunity to let it shine. Themed packs are ideal for the festive season, or you can use vintage-looking fabrics or any random fabrics that you have, whether they match or not! Other fabric scraps: Your fabrics don’t have to be from a charm pack – you can just cut the shapes from any scrap fabrics you have that fit the template. Felt: I’ve also used different coloured felt for each pennant from my stash: if you use one colour you will get two pennants from a 12in (30.5cm) square.Button options
My buttons are random colours and shapes – a great way of using those odd buttons you didn’t think had a purpose!Shaped scissors
I’ve used scalloped shears to shape the background felt, but standard pinking shears would also create a pretty effect. Alternatively, you could simply just cut a straight edge.Binding options
I’ve used the remaining fabric after cutting my templates plus a little extra scrap fabric for the strip that secures the Dresden pennants, but you can use whatever you have or even opt for ready-made bias binding.Bonus project
At the end of the instructions, you’ll find out how to use the template to make a matching tablemat.Make it your own!
- Sew more Dresden pennants to make a longer strip of bunting.
- Choose a colour theme and make the bunting in, say, blue and white or neutrals.
- Add lace for a vintage look.
- Include a few sparkly fabrics or trims for a party mood.
By the end of this project, you’ll have:
- Used fabric and felt leftovers to make pretty bunting for your home or as a gift.
- Learned how to make Suffolk puffs.
- Made fun ‘scrappy’ binding.
You may also like:
Need more crafting inspo?
For further ideas, check out the Half Yard™ Sewing Club Facebook page or Pinterest.
MEMBERS ONLY: To gain full access to the Half Yard Club projects please login or sign up
You will need:
Equipment
- Sewing machine with a standard foot or a ¼in (5mm) foot if you have one
- Dressmaking shears/scissors
- Scalloped or standard pinking shears
- Pins
- Optional: spray starch such as Best Press
- Optional: fabric clips
Materials
- 18 5in (12.75cm) squares of fabric for the pennants (or make more for a longer string of bunting or to make the tablemat as well)
- Six 4in (10cm) squares of fabric for the Suffolk puffs – one for each pennant
- 36 x 12in (91.5 x 30.5cm) of felt: I used felt leftovers in different colours for mine
- 38 x 14in (96.5 x 35.5cm) of sew-in interfacing (or you can use fusible, as I did, if that is what you have)
- Six buttons – or more, as needed
- Optional: if using shop-bought binding, you will need 2yd (1.9m) of ¼in (0.75cm) wide binding
MEMBERS ONLY: To gain full access to the Half Yard Club projects please login or sign up
Project steps:
Step 1
This is content that only logged members can see! Please create an account or login to be able to view project steps, otherwise you'll be limited to non-member content.
This is content that only logged members can see! Please create an account or login to be able to view project steps, otherwise you'll be limited to non-member content.
Step 2
This is content that only logged members can see! Please create an account or login to be able to view project steps, otherwise you'll be limited to non-member content.
This is content that only logged members can see! Please create an account or login to be able to view project steps, otherwise you'll be limited to non-member content.